
Introduction: The Ultimate Hug in a Baking Dish
There are dinners that simply feed people, and then there are dinners that create memories. The Beefy Garlic Butter Bowl belongs firmly in the second category. This is not a meal you eat while scrolling through your phone or standing over the kitchen counter. This is a meal that demands you sit down, take a deep breath, and savor every single bite of its cheesy, garlicky, beefy, buttery glory.
Let us be honest about what this recipe is. It is not low-calorie. It is not pretending to be healthy. It does not contain cauliflower rice or zucchini noodles or any other vegetable masquerading as something it is not. What it does contain is honest, straightforward, deeply satisfying comfort food: seasoned ground beef, creamy garlic butter rice, a rich beef broth reduction, and a blanket of two cheeses—sharp cheddar and stretchy mozzarella—melted to golden, bubbly perfection.
This dish is the culinary equivalent of a weighted blanket on a cold winter evening. It is the kind of meal that makes children race to the dinner table and adults sneak seconds when no one is looking. It is potluck gold, game-day glory, and weeknight salvation all rolled into one baking dish. And despite its impressive flavor profile and indulgent reputation, it is remarkably simple to prepare, requiring just one skillet, one saucepan, and one baking dish.
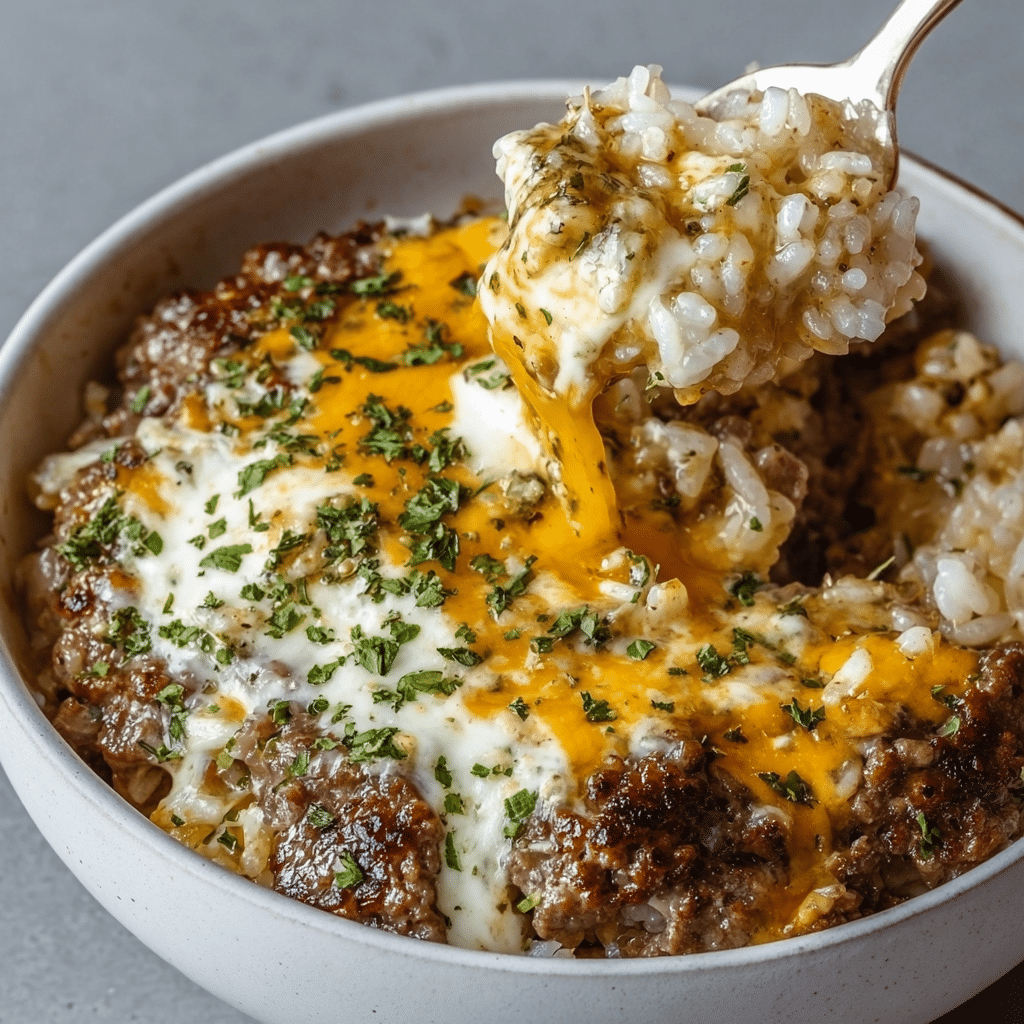
The “bowl” in the name refers not to the serving vessel but to the experience: each portion is a personal bowl of comfort, a self-contained landscape of creamy rice, savory beef, and molten cheese. When you pull this casserole from the oven, golden and bubbling at the edges, you will understand why it has earned a devoted following among home cooks seeking maximum flavor with minimal fuss.
In this article, we will explore every nuance of the Beefy Garlic Butter Bowl. We will discuss the best ingredients, from selecting the right ground beef to understanding the role of heavy cream. We will walk through a detailed, step-by-step method that ensures success, whether you are a novice cook or an experienced meal-prepper. Finally, we will answer the most frequently asked questions, offering substitutions, storage tips, and creative variations to make this recipe a permanent fixture in your family’s rotation.
Preheat your oven to 375°F. It is time to make something unforgettable.
Ingredients: The Building Blocks of Beefy, Garlicky Bliss
Before we fire up the stove, let us take a moment to appreciate each ingredient. This recipe contains no fillers, no unnecessary steps, and no mysterious components. Every item on this list has a job, and understanding those jobs is the key to culinary success. Below is the complete list, followed by detailed notes on selection, quality, and potential substitutions.
The Core Ingredients:
- 1 lb ground beef
- 2 cups cooked white rice
- 4 tablespoons butter (1/2 stick)
- 4 cloves garlic, minced
- 1 cup beef broth
- 1.5 cups shredded cheddar cheese
- 1 cup shredded mozzarella cheese
- 1/2 cup heavy cream
- 1 teaspoon onion powder
- 1 teaspoon paprika
- Salt and pepper to taste
- Fresh parsley for garnish
Cook Mode Note: As you prepare this recipe, you may want to prevent your screen from going dark. Most devices offer a “stay awake” or “cook mode” setting in their display options, allowing you to reference the instructions without constantly tapping the screen.
Ingredient Deep Dive
1. Ground Beef (1 lb)
Ground beef is the protein anchor of this dish, providing savory depth, richness, and that unmistakable beefy flavor that defines comfort food. The recipe calls for 1 pound, which is the perfect amount to create a substantial layer without overwhelming the rice. For the best results, choose ground beef with a fat content of 80/20 (80% lean, 20% fat). The fat adds flavor and moisture; leaner blends (like 90/10) can result in dry, crumbly meat. If you use a higher-fat blend (like 70/30), you will need to drain more fat after browning. Grass-fed beef offers a richer, more complex flavor, but conventional beef works beautifully. Avoid pre-seasoned or flavored ground beef, as it will compete with the garlic butter and cheese.
2. Cooked White Rice (2 cups)
White rice serves as the creamy, starchy base of the dish, absorbing the garlic butter, beef broth, and heavy cream to become something far greater than plain rice. Long-grain white rice (such as jasmine or basmati) is ideal because it maintains its individual grain structure even after simmering in liquid. Medium-grain rice (like Calrose) will produce a creamier, almost risotto-like texture, which is also delicious. Avoid brown rice, which requires much longer cooking times and a different liquid ratio. The recipe calls for pre-cooked rice, which is a massive time-saver. Day-old refrigerated rice works particularly well because it is slightly dried out and will absorb the creamy sauce without becoming mushy. If you do not have pre-cooked rice, cook 1 cup of dry white rice according to package directions to yield approximately 2 cups cooked.
3. Butter (4 tablespoons / 1/2 stick)
Butter is the first pillar of the “garlic butter” promise. It provides richness, flavor, and the medium in which the garlic releases its aromatic oils. Unsalted butter is strongly recommended because it allows you to control the salt level (the beef broth and cheeses already contain significant sodium). If you only have salted butter, reduce or omit additional salt in the recipe. The butter should be melted gently over medium heat; do not let it brown or burn, as this will create a bitter, nutty flavor that competes with the garlic. For an even more decadent dish, you can increase the butter to 6 tablespoons, but 4 provides a perfect balance.
4. Garlic (4 cloves, minced)
Garlic is the second pillar of the “garlic butter” promise and arguably the most aromatic ingredient in the entire dish. Four cloves may sound like a lot, but garlic mellows dramatically when cooked, losing its sharp, raw bite and developing a sweet, nutty, almost caramelized flavor. Mincing the garlic finely (rather than slicing or leaving whole) ensures that it distributes evenly throughout the rice and every bite contains a hint of garlicky goodness. For the best flavor, use fresh garlic cloves rather than pre-minced jarred garlic, which often contains preservatives and has a flat, bitter taste. If you are a true garlic lover, feel free to add a fifth or sixth clove.
5. Beef Broth (1 cup)
Beef broth provides the savory liquid that transforms plain rice into a creamy, flavorful base. It adds depth, umami, and a meaty richness that complements the ground beef. Use low-sodium or unsalted beef broth whenever possible, as this gives you control over the final salt level. If you only have regular beef broth, taste before adding additional salt. For an even more intense beef flavor, use beef bone broth, which has a richer, more collagen-dense profile. In a pinch, chicken broth or vegetable broth will work, but the final dish will lack some of that deep, savory character. You can also use 1 cup of water plus 1 teaspoon of beef bouillon or Better than Bouillon.
6. Shredded Cheddar Cheese (1.5 cups)
Cheddar brings sharp, tangy, nutty flavors that cut through the richness of the butter, cream, and beef. It is the primary cheese in this dish, providing the bold flavor that makes the casserole memorable. Sharp or extra-sharp cheddar is preferred over mild cheddar, as it stands up better to the other robust ingredients. Shred your own cheese from a block whenever possible. Pre-shredded cheese is coated with anti-caking agents (cellulose or potato starch) that prevent it from melting smoothly and can leave a gritty texture. A block of cheddar shredded on a box grater takes only 60 seconds and makes a noticeable difference in creaminess.
7. Shredded Mozzarella Cheese (1 cup)
Mozzarella is the second cheese, and its role is texture rather than flavor. Mozzarella is famous for its exceptional meltability and glorious cheese pull—those long, stretchy strings that make every bite a photo opportunity. It has a mild, milky flavor that does not compete with the cheddar but rather supports it. Low-moisture, part-skim mozzarella (the kind sold in blocks or pre-shredded bags) is ideal. Fresh mozzarella (packed in water) contains too much moisture and will make the dish watery. Like the cheddar, shred your own mozzarella for the best melting results.
8. Heavy Cream (1/2 cup)
Heavy cream is the secret weapon that elevates the garlic butter rice from ordinary to extraordinary. It adds richness, body, and a velvety smoothness that cannot be achieved with milk alone. The high fat content (36% or more) also helps emulsify the sauce, preventing it from breaking or separating during baking. Do not substitute half-and-half, light cream, or milk; they contain less fat and will result in a thinner, less luxurious sauce. If you are looking to reduce calories, this is not the recipe for you—and that is perfectly fine. Some dishes are meant to be indulgent, and this is one of them.
9. Onion Powder (1 teaspoon)
Onion powder provides a savory, allium-based depth without the moisture or texture of fresh onions. It dissolves seamlessly into the ground beef and the rice sauce, adding a background note that supports the garlic and beef. Do not substitute onion salt, which contains added sodium and will throw off the salt balance. If you do not have onion powder, you can omit it or use a pinch of dried minced onion (though it will not dissolve as completely).
10. Paprika (1 teaspoon)
Paprika adds color and a subtle, sweet, peppery flavor. It is not spicy (unless you use hot paprika, which is a different product). The recipe calls for sweet or smoked paprika; both work beautifully, though smoked paprika will add a deeper, more complex, almost bacon-like note. Paprika also contributes to the golden-orange hue of the finished dish, making it visually appealing as well as delicious.
11. Salt and Pepper (to taste)
These foundational seasonings are non-negotiable. Salt enhances the natural flavors of every ingredient, while black pepper adds warmth and bite. Use kosher salt or fine sea salt rather than table salt, which can taste harsh and metallic. For the pepper, freshly ground black pepper is always superior to pre-ground. Season the ground beef while browning (most of the salt will go there), then taste the rice mixture before assembling and adjust if needed.
12. Fresh Parsley (for garnish)
Fresh parsley is not just decoration, though it does add a beautiful pop of green against the golden cheese. It provides a fresh, slightly peppery, herbaceous note that cuts through the richness of the casserole. Flat-leaf (Italian) parsley is preferred over curly parsley for its stronger flavor. Chop the parsley finely and sprinkle it over the finished dish just before serving. If you do not have parsley, fresh chives, thyme, or even a sprinkle of dried oregano can work as substitutes.
Preparation Method: Step-by-Step to Beefy, Cheesy Perfection
Now, we move from ingredient appreciation to action. Follow these instructions carefully, and you will be rewarded with a perfect Beefy Garlic Butter Bowl. The total active time is approximately 25 minutes, with a bake time of 25–30 minutes plus optional broiling.
Step 1: Preheat the Oven and Prepare Your Baking Dish (2 minutes)
Action: Preheat your oven to 375°F (190°C) . While the oven is heating, grease a 9×13-inch baking dish with butter, non-stick cooking spray, or a light coating of oil. Set the dish aside.
Why this matters: A 375°F oven is the ideal temperature for this casserole. It is hot enough to melt the cheeses thoroughly and bubble the edges without burning the top before the center is heated through. Greasing the baking dish prevents the creamy rice from sticking to the bottom and sides, which would make serving difficult and cleanup unpleasant. The 9×13 dish provides the perfect surface area: the rice and beef layers will be approximately 1 to 1.5 inches thick, allowing for even cooking.
Pro Tip: For even easier cleanup and guaranteed release, line the bottom of the dish with parchment paper before greasing. The paper will extend slightly up the sides, making it easy to lift out portions if desired.
Step 2: Brown the Ground Beef (8–10 minutes)
Action: Place a large skillet over medium-high heat. Add the 1 lb of ground beef. Season immediately with:
- 1 teaspoon onion powder
- 1 teaspoon paprika
- Salt and pepper to taste (start with 1/2 teaspoon salt and 1/4 teaspoon pepper)
Break the meat apart with a wooden spoon or spatula. Cook, stirring occasionally, until the beef is fully browned with no pink remaining, approximately 8 to 10 minutes. Once browned, carefully drain the excess fat from the skillet. You can tip the skillet at an angle and spoon out the fat, or transfer the beef to a paper-towel-lined plate to drain before returning it to the skillet.
Why this matters: Browning the beef properly develops the Maillard reaction—the chemical process that creates deep, savory, caramelized flavors. Seasoning the meat while it cooks allows the spices to penetrate the beef rather than just sitting on the surface. Draining the excess fat is crucial; if left in, the casserole will become greasy and the cheese may separate. However, do not drain aggressively; a thin film of fat remaining in the skillet adds flavor.
Pro Tip: Do not crowd the skillet. If your skillet is small (less than 10 inches), brown the beef in two batches. Overcrowding causes the meat to steam rather than sear, resulting in gray, flavorless beef. A properly browned piece of beef should have dark brown, almost crispy edges.
Step 3: Prepare the Garlic Butter Rice (6–8 minutes)
Action: While the beef is browning, you can begin the rice sauce, or wait until the beef is done and set it aside. In a separate saucepan (medium size), melt 4 tablespoons of butter over medium heat. Once the butter is fully melted and slightly bubbling (but not browning), add 4 cloves of minced garlic. Sauté for 1 to 2 minutes, stirring frequently, until the garlic is fragrant and just beginning to turn golden. Do not let it brown or burn, as burnt garlic becomes bitter.
Add the following ingredients to the saucepan:
- 2 cups cooked white rice
- 1 cup beef broth
- 1/2 cup heavy cream
Stir everything together until well combined. Bring the mixture to a gentle simmer, then reduce the heat to medium-low. Cook for 3 to 4 minutes, stirring occasionally, until the liquid has been absorbed and the rice is creamy and slightly thickened. The rice should not be soupy; it should have the consistency of a wet risotto.
Why this matters: Simmering the rice in the garlic butter, beef broth, and heavy cream transforms plain leftover rice into a luxurious, flavorful base. The rice absorbs the savory liquid, becoming plump and creamy. The garlic infuses every grain. The heavy cream adds richness and body. This step is what elevates the dish from “beef and rice casserole” to “Beefy Garlic Butter Bowl.”
Pro Tip: If the rice seems too dry after 3–4 minutes, add an extra 1/4 cup of beef broth or water. If it seems too wet, simmer for an additional 1–2 minutes. The final texture should be creamy but not runny.
Step 4: Assemble the Casserole (3 minutes)
Action: Transfer the garlic butter rice mixture from the saucepan into your greased 9×13 baking dish. Use a spatula to spread it into an even, flat layer covering the entire bottom of the dish.
Next, take the browned ground beef (if you set it aside, return it to the skillet to reheat briefly). Spread the beef evenly over the rice layer, distributing it all the way to the edges.
Finally, top with the cheeses:
- Sprinkle 1.5 cups shredded cheddar cheese evenly over the beef.
- Sprinkle 1 cup shredded mozzarella cheese evenly over the cheddar.
Why this matters: Layering matters. The rice on the bottom absorbs any juices that drip down from the beef and cheese. The beef in the middle provides a savory, protein-rich core. The cheeses on top melt and bubble, forming a golden, protective crust that locks in moisture and adds the irresistible pull of melted cheese. Spreading each layer evenly ensures that every serving has the perfect ratio of rice, beef, and cheese.
Pro Tip: For a more dramatic cheese pull, reserve 1/4 cup of each cheese and sprinkle it on top halfway through baking, or add it during the final 5 minutes.
Step 5: Bake the Casserole (25–30 minutes)
Action: Place the assembled casserole, uncovered, on the middle rack of your preheated 375°F (190°C) oven. Bake for 25 to 30 minutes. You will know the casserole is ready when:
- The cheese is completely melted, golden, and bubbly.
- The edges of the casserole are bubbling vigorously.
- The casserole appears puffed and set, not wobbly in the center.
Why this matters: Baking uncovered allows the cheese to brown and the top to develop texture. The 25–30 minute window is calibrated to heat the casserole all the way through (all components are already cooked, so we are simply melting the cheese and melding flavors) without burning the cheese or drying out the rice. The gentle heat of 375°F ensures that the interior becomes piping hot before the top over-browns.
Pro Tip: Ovens vary. Start checking your casserole at the 20-minute mark. If the cheese is browning too quickly but the center does not look hot and bubbly, loosely tent a piece of aluminum foil over the dish for the remaining bake time. This reflects direct heat while allowing the interior to finish cooking.
Step 6: Broil for a Golden Top (Optional, 2–3 minutes)
Action: If you desire an extra-crispy, deeply golden, slightly blistered cheese top, turn your oven to broil after the 25–30 minute bake. Place the casserole on the top rack (closer to the broiler element) and broil for 2 to 3 minutes. Watch the casserole constantly through the oven window—the cheese can go from golden to burnt in seconds. Remove the moment the top reaches your desired level of browning.
Why this matters: Broiling applies intense, direct heat to the surface of the casserole, creating a dramatic, restaurant-quality finish. The cheese becomes deeply caramelized, with crispy, dark edges and a satisfying crunch. This step is optional but highly recommended for those who love texture contrast.
Pro Tip: Do not walk away during broiling. Do not check your phone. Do not answer the door. Stand at the oven and watch. Burnt cheese is one of the saddest kitchen accidents, and it happens fast.
Step 7: Rest, Garnish, and Serve (5+ minutes)
Action: Remove the casserole from the oven and place it on a heat-resistant trivet or cooling rack. Let it rest for at least 5 minutes (10 minutes is even better). During this resting period, chop a small handful of fresh parsley. After resting, sprinkle the parsley evenly over the casserole for a pop of green color and fresh flavor. Scoop portions onto plates using a large spoon or spatula, ensuring each serving includes rice, beef, and plenty of cheesy topping. Serve hot.
Why this matters: The 5-minute rest is not optional. Fresh from the oven, the casserole is a molten, bubbling lake of cheese and cream. If you serve it immediately, the layers will slide apart, the cheese will stretch into unmanageable strings, and you risk burning your mouth. Resting allows the casserole to “set”: the cheese firms up slightly, the starches in the rice absorb excess moisture, and the flavors meld together. A rested casserole holds its shape on the plate and tastes better.
Pro Tip: Serve this casserole with simple sides that balance its richness. A crisp green salad with a lemony vinaigrette, steamed green beans, roasted asparagus, or even a spoonful of tangy coleslaw are all excellent choices. A squeeze of fresh lemon over the vegetables cuts through the richness beautifully.
Conclusion: Comfort Food at Its Most Honest
The Beefy Garlic Butter Bowl is not trying to be anything other than what it is: a deeply satisfying, unapologetically rich, cheesy, garlicky, beefy casserole that delivers exactly what it promises. It is the kind of meal that makes you close your eyes after the first bite. It is the kind of meal that generates texts the next day: “That casserole you made? Can I get the recipe?” It is the kind of meal that becomes a family legend, requested for birthdays, holidays, and ordinary Tuesdays alike.
What makes this recipe so successful is its honesty. It does not hide vegetables where they do not belong. It does not pretend to be healthy. It embraces its role as a special-occasion comfort food that is easy enough to make any night of the week. The ingredients are accessible, the technique is straightforward, and the results are consistently spectacular.
In a world of complicated recipes and endless dietary restrictions, there is something liberating about a dish like this. It invites you to cook with joy rather than anxiety, to serve with pride rather than apology, and to eat with pleasure rather than guilt. That is the magic of the Beefy Garlic Butter Bowl.
So preheat your oven, brown that beef, mince that garlic, and shred that cheese. Your family is waiting, and comfort is just 45 minutes away.
Frequently Asked Questions (FAQ)
1. Can I use a different type of meat instead of ground beef?
Absolutely. Ground turkey, ground chicken, or ground pork all work beautifully, though each will change the flavor profile. Ground turkey is leaner and milder; you may want to add an extra tablespoon of butter or a splash of Worcestershire sauce to boost savoriness. Ground pork is richer and pairs wonderfully with the garlic butter. For a non-ground option, finely chopped leftover pot roast, shredded brisket, or even cooked Italian sausage (casings removed) can be substituted. If using a very lean meat (like ground turkey breast), add 1 tablespoon of olive oil to the skillet before browning to prevent sticking and dryness.
2. Can I make this recipe gluten-free?
Yes, this recipe is naturally gluten-free as written, with one caveat. All ingredients—ground beef, rice, butter, garlic, beef broth (check the label; most are gluten-free), cheese, heavy cream, onion powder, paprika, salt, pepper, parsley—are gluten-free. The only potential hidden gluten is in the beef broth; some brands add gluten-containing thickeners. Look for beef broth labeled “gluten-free” or make your own. Otherwise, this recipe is safe for those with celiac disease or gluten sensitivity.
3. Can I use brown rice instead of white rice?
Technically yes, but the texture will be different and you will need to adjust the liquid. Brown rice is denser and requires more liquid and a longer cooking time to become tender. The recipe as written is designed for pre-cooked white rice. To use brown rice, cook it fully before adding to the sauce, then increase the beef broth to 1.5 cups and the simmering time to 8–10 minutes. The final texture will be chewier and nuttier, which some people prefer. Instant brown rice (the quick-cooking variety) works better than regular brown rice.
4. How do I store and reheat leftovers?
Store leftovers in an airtight container in the refrigerator for up to 3 days. To reheat, the oven is best: preheat to 350°F (175°C), place leftovers in an oven-safe dish, cover with foil (to prevent the cheese from burning), and bake for 10–15 minutes until hot throughout. The microwave is faster: place a portion on a microwave-safe plate and heat in 45-second intervals on medium power until hot. The microwave will make the rice slightly softer and the cheese less stretchy, but it is perfectly acceptable for a quick lunch. Leftovers can also be frozen for up to 2 months; thaw overnight in the refrigerator before reheating.
5. Can I freeze this casserole before baking?
Yes, this is an excellent make-ahead meal. Assemble the casserole completely as instructed (rice layer, beef layer, cheese topping) but do not bake it. Cover the dish tightly with plastic wrap, then a layer of aluminum foil. Freeze for up to 3 months. To bake from frozen, remove the plastic wrap and foil, then re-cover with fresh foil (leaving the plastic off!). Bake at 375°F (190°C) for 45–55 minutes, removing the foil for the final 10–15 minutes to brown the cheese. You can also thaw overnight in the refrigerator and bake as directed (25–30 minutes).
6. The cheese on my casserole turned out oily or separated. What went wrong?
Oily, separated cheese is usually caused by one of three issues. First, using pre-shredded cheese (which contains anti-caking agents) can lead to an oily texture. Always shred your own cheese from a block. Second, the oven temperature may have been too high, causing the cheese to break (the fats separate from the solids). Use an oven thermometer to verify your oven is at 375°F, not higher. Third, the casserole may have been over-baked. Bake only until the cheese is melted and bubbly, not until it is dark brown and crisp (unless you are broiling intentionally). A small amount of oil on the surface is natural and can be blotted with a paper towel.
7. Can I add vegetables to this dish?
Yes, and it is a great way to add color and nutrition. Sautéed mushrooms, finely diced bell peppers, or thawed frozen peas and carrots can be mixed into the beef layer. Sautéed spinach (well-drained) or roasted broccoli can be layered between the beef and cheese. Avoid watery vegetables like fresh zucchini, tomatoes, or frozen spinach (unless thawed and squeezed dry), as excess liquid will make the rice soggy and prevent the cheese from browning properly. If adding vegetables, reduce the beef broth to 3/4 cup to compensate for the extra moisture.
8. I don’t have heavy cream. What can I use instead?
Heavy cream is ideal, but you have options. The closest substitute is half-and-half (use 1/2 cup plus 1 tablespoon of melted butter to approximate the fat content). Evaporated milk (not sweetened condensed milk) works surprisingly well and is lower in fat; use 1/2 cup. In a pinch, whole milk mixed with 2 tablespoons of melted butter can substitute, but the sauce will be thinner. Do not use skim milk, almond milk, or other non-dairy milks; they lack the fat necessary to create a creamy, stable sauce and may curdle.
9. Can I make this recipe in individual ramekins instead of one large dish?
Yes, and this is a fantastic presentation for dinner parties. Divide the rice, beef, and cheese among 6 to 8 individual ramekins (about 8-ounce capacity). Place the ramekins on a baking sheet for easy handling. Bake at 375°F for 15–20 minutes, until the cheese is melted and bubbly. Individual portions bake faster because there is less mass, so start checking at the 12-minute mark. Broiling is not recommended for ramekins unless they are broiler-safe.
10. Why did my rice turn out mushy or gummy?
Mushy rice is usually caused by using freshly cooked, hot rice rather than pre-cooked or leftover rice. Freshly cooked rice has a higher moisture content and is more fragile; when simmered in the sauce, it can break down into a paste. For best results, use rice that has been cooked and cooled (even refrigerated overnight). If you must use freshly cooked rice, spread it on a baking sheet and let it cool completely (even refrigerate for 30 minutes) before adding it to the sauce. Also, avoid over-stirring the rice once it is in the sauce, as agitation can break the grains.
11. Can I add a crunchy topping to this casserole?
Absolutely. For textural contrast, add a crunchy topping during the final 5 minutes of baking or after broiling. Options include: crushed buttery crackers (like Ritz) tossed with melted butter, panko breadcrumbs mixed with Parmesan cheese, French fried onions (the kind used for green bean casserole), or even crushed potato chips. Sprinkle the topping over the cheese and return to the oven for 3–5 minutes, or broil for 1 minute (watch carefully, as crumbs burn quickly).
12. Is this recipe kid-friendly?
Yes, overwhelmingly so. Children tend to love the combination of beef, rice, and melted cheese—it is essentially a deconstructed cheeseburger bowl. To make it even more appealing to young palates, consider using mild cheddar instead of sharp, and ensure the garlic is finely minced (larger pieces of garlic can be off-putting to some children). You can also serve the casserole with sides that children enjoy, such as apple slices, carrot sticks, or a small bowl of fruit. Many parents report that this recipe is one of the few that generates zero complaints and active requests for seconds.
Beefy Garlic Butter Bowl Recipe: A Cheesy, Comforting, One-Pan Family Dinner

This beefy garlic butter bowl is a cheesy, comforting one-pan family dinner made with seasoned beef, creamy garlic rice, and melted cheese baked to perfection.
- Prep Time: 10 minutes
- Cook Time: 30 minutes
- Total Time: 40 minutes
- Yield: 6 servings
- Category: Main Dish, Casserole
- Method: Bake
- Cuisine: American Comfort Food
Ingredients
- 1 lb ground beef
- 2 cups cooked white rice
- 4 tbsp butter
- 4 cloves garlic, minced
- 1 cup beef broth
- 1.5 cups shredded cheddar cheese
- 1 cup shredded mozzarella cheese
- 1/2 cup heavy cream
- 1 tsp onion powder
- 1 tsp paprika
- Salt and pepper to taste
- Fresh parsley for garnish
Instructions
- Preheat oven to 375°F (190°C). Brown ground beef in a skillet and season with salt, pepper, onion powder, and paprika. Drain excess fat.
- Melt butter in a saucepan and sauté garlic for 1–2 minutes.
- Add cooked rice, beef broth, and heavy cream. Simmer 3–4 minutes until creamy.
- Spread garlic butter rice into a greased 9×13 baking dish.
- Layer cooked beef over rice evenly.
- Top with cheddar and mozzarella cheese.
- Bake 25–30 minutes until bubbly and melted.
- Broil 2–3 minutes for a golden top if desired.
- Garnish with parsley and serve hot.
Notes
- Freshly shredded cheese melts better than pre-shredded.
- Add a splash of broth if rice seems dry.
- Can substitute ground turkey for a lighter version.