

Introduction
There are few dishes in the world of Chinese-American cuisine that command as much devotion, curiosity, and outright craving as General Tso’s Chicken. Named not for a military strategist but for a 19th-century Hunanese general, Zuo Zongtang, this dish has become a staple of takeout menus across North America. Yet, for all its popularity, truly exceptional General Tso’s Chicken remains surprisingly elusive. The version delivered in white cardboard boxes is often soggy, overly sweet, or burdened with a cloying, one-dimensional sauce that masks rather than complements the chicken.
This article is your professional guide to changing that. We will create a homemade General Tso’s Chicken that is everything takeout promises but rarely delivers: shatteringly crisp, perfectly glazed, and balanced in its sweet, sour, savory, and spicy notes. The recipe you are about to master uses only the ingredients you have provided—chicken breasts, all-purpose flour (or cornstarch), paprika, garlic salt, oil for frying, sugar, water, white distilled vinegar, salt, soy sauce, and optional red chili pepper flakes. No obscure Asian pantry items. No MSG debates. No deep-fryer required. Just straightforward techniques and a clear understanding of why each step matters.
Before we dive into the method, let us address the philosophy behind this dish. General Tso’s Chicken belongs to a family of “sweet and sour” preparations, but unlike its pineapple-laden cousin, it relies on a more sophisticated balance. The sugar provides caramelized sweetness. The white distilled vinegar offers a clean, sharp acidity that cuts through the richness of the fried chicken. The soy sauce delivers umami and salinity. The chili flakes introduce a gentle, building heat. And the coating—whether you choose flour or cornstarch—determines whether your chicken emerges from the oil as a golden, craggy masterpiece or a pale, greasy disappointment.
Texture is the battleground where most homemade versions fail. The enemy is steam. When you toss freshly fried chicken in a hot sauce, the moisture from the sauce immediately attacks the crispy crust. Professional kitchens combat this by using a very thick, syrupy sauce that clings to the surface rather than soaking in, and by serving the dish immediately. We will replicate this at home with a simple, foolproof simmering technique.
Furthermore, this recipe respects the ingredient list you provided by treating the optional red chili pepper flakes as exactly that—optional. If you omit them, you will have a sweet, savory, and tangy dish suitable for palates that prefer no heat. If you include them, you will experience the classic gentle warmth that makes General Tso’s Chicken so addictive.
This article is written for the home cook who wants professional results. We will cover ingredient selection, proper oil temperature, the science of frying, sauce viscosity, and timing. We will also answer the most frequently asked questions about this dish, from gluten-free adaptations to reheating strategies. By the end, you will not only have a recipe but a deep understanding of how to achieve crispy, glossy, restaurant-quality General Tso’s Chicken every single time.
Let us begin by assembling our ingredients and understanding their roles.
Ingredients
This recipe serves 4 as a main course with steamed rice and vegetables. Precise measurements are critical for the sauce’s balance, so please use standard measuring cups and spoons.
For the Chicken Coating and Frying:
- 4 chicken breasts, cubed – Use boneless, skinless chicken breasts. Cut them into uniform 1-inch (2.5 cm) cubes. Uniformity ensures even cooking. You can substitute chicken thighs for juicier results, but breasts work beautifully when not overcooked. The total weight should be approximately 600-700g (1.3-1.5 lbs).
- 1 cup all-purpose flour (or cornstarch) – This is your coating. All-purpose flour produces a slightly thicker, craggier crust reminiscent of traditional American-Chinese takeout. Cornstarch produces a lighter, shatteringly crisp, almost glass-like crust that many professional kitchens prefer. Both work excellently. The choice is yours. We will explain the differences in the FAQs.
- 1 teaspoon paprika – This adds a mild, sweet pepper flavor and, more importantly, a rich orange-red color to the fried chicken. It does not add heat. Do not substitute with smoked paprika unless you want a barbecue-like flavor profile.
- 2 teaspoons garlic salt – This is a blend of garlic powder, salt, and anti-caking agents. It seasons the coating deeply. Do not substitute with garlic powder plus salt separately unless you adjust ratios (use 1 teaspoon garlic powder + 1 teaspoon fine salt).
- 3/4 cup oil (for frying) – Use a neutral oil with a high smoke point. Canola, vegetable, peanut, or sunflower oil are ideal. Do not use olive oil (smoke point too low) or coconut oil (flavor too dominant). You need enough oil to reach a depth of about 1 inch (2.5 cm) in your pan.
For the Sauce:
- 1 1/4 cup sugar – White granulated sugar. This large quantity may seem alarming, but it is traditional for this dish. The sugar caramelizes and creates the signature glossy, sticky sauce that clings to the chicken. Do not reduce it without understanding that the texture and balance will change.
- 1 cup water – Plain tap water is fine. This forms the base of the sauce and helps dissolve the sugar.
- 1 cup white distilled vinegar – This is the sour component. White distilled vinegar is sharp and clean with no additional flavors. Do not substitute with apple cider vinegar or rice vinegar unless you want a different flavor profile; they will work but produce a milder, fruitier sourness.
- 1 teaspoon salt – Additional salt beyond the garlic salt in the coating. This seasons the sauce and balances the sweetness.
- 6 tablespoons soy sauce – Use regular (all-purpose) soy sauce, not dark soy sauce (too thick and sweet) and not light soy sauce (too salty and thin). Low-sodium soy sauce is acceptable but you may need to add a pinch more salt at the end.
- 1 teaspoon red chili pepper flakes (optional) – Crushed red pepper flakes. These provide heat. The quantity listed produces a mild to medium warmth. Increase to 2 teaspoons for a spicier version or omit entirely for a zero-heat dish. Do not use fresh chili peppers unless you adjust for water content.
For Serving (Not in your ingredient list, but recommended):
- Steamed jasmine or white rice
- Steamed broccoli florets
- Sesame seeds (for garnish)
- Sliced green onions (for garnish)
Special Equipment:
- Heavy-bottomed skillet or wok (at least 12-inch / 30cm diameter) – for frying
- Medium saucepan – for making the sauce
- Deep-fry thermometer (highly recommended) or a small piece of bread for testing oil temperature
- Wire cooling rack set over a baking sheet – for draining fried chicken
- Slotted spoon or spider strainer
- Mixing bowls (one large, one medium)
- Tongs
- Paper towels
Preparation Method
This method is divided into four logical phases: preparing the chicken, making the sauce, frying the chicken, and final assembly. Read through the entire method before beginning. The frying and sauce-making happen simultaneously in the last phase, so organization is key.
Phase 1: Prepare the Chicken and Coating
Proper preparation ensures that once you start frying, you are not scrambling to measure ingredients.
Step 1.1: Cube the chicken uniformly.
Place the 4 chicken breasts on a cutting board. Pat them completely dry with paper towels. Excess moisture will prevent the coating from adhering. Using a sharp chef’s knife, cut each breast into 1-inch (2.5 cm) cubes. Aim for cubes of equal size. Irregular pieces will cook unevenly—small pieces will become dry and tough while large pieces remain undercooked. You should have approximately 30-40 cubes.
Step 1.2: Prepare the dry coating mixture.
In a large mixing bowl, combine the following dry ingredients:
- 1 cup all-purpose flour (or cornstarch)
- 1 teaspoon paprika
- 2 teaspoons garlic salt
Whisk them together thoroughly with a fork or small whisk. The paprika and garlic salt should be evenly distributed throughout the flour. If you see streaks of orange or white patches of salt, keep mixing.
Step 1.3: Coat the chicken.
Add the cubed chicken to the bowl with the dry coating mixture. Using your clean hands or tongs, toss the chicken pieces until each cube is completely and evenly coated. Shake off any excess coating by lifting the chicken pieces and gently tapping them against the side of the bowl. You want a thin, even layer, not a thick, pasty clump. Place the coated chicken pieces on a clean plate or baking sheet in a single layer. Let them rest for 5-10 minutes. This resting period allows the coating to adhere more firmly, reducing the amount of flour that falls off during frying.
Phase 2: Make the General Tso’s Sauce
The sauce is the soul of this dish. It must be made before you begin frying because the frying process is fast and the sauce needs time to thicken properly.
Step 2.1: Combine the sauce ingredients.
In a medium saucepan (not the frying pan), combine:
- 1 1/4 cup sugar
- 1 cup water
- 1 cup white distilled vinegar
- 1 teaspoon salt
- 6 tablespoons soy sauce
- 1 teaspoon red chili pepper flakes (optional)
Do not turn on the heat yet. Stir everything together with a whisk or wooden spoon until the sugar begins to dissolve. The mixture will look cloudy and thin at this stage.
Step 2.2: Bring to a boil.
Place the saucepan over medium-high heat. Stir occasionally to prevent the sugar from scorching on the bottom. Bring the mixture to a full, rolling boil. You will see large bubbles breaking vigorously across the entire surface. This usually takes 3-5 minutes depending on your stove.
Step 2.3: Simmer and thicken.
Once boiling, reduce the heat to medium-low. The sauce should maintain a gentle simmer—small bubbles rising slowly to the surface. Simmer uncovered for 8-12 minutes, stirring every 2 minutes. During this time, the water will evaporate, and the sugar will concentrate, causing the sauce to thicken. You are looking for a syrupy consistency: when you drag a wooden spoon through the sauce, the liquid should coat the back of the spoon and leave a clear path that slowly fills in. The sauce will reduce by approximately one-third.
Critical note: Do not walk away from the sauce. Sugar-based sauces can go from perfectly syrupy to burnt caramel in less than 30 seconds. If the sauce becomes too thick before your chicken is fried, remove it from the heat and set it aside. You can reheat it gently when ready.
Phase 3: Fry the Chicken to Golden, Shattering Crispiness
Now we enter the most technically demanding phase. Proper oil temperature is everything.
Step 3.1: Heat the oil.
Pour the 3/4 cup of oil into your large skillet or wok. The oil should be about 1 inch (2.5 cm) deep. Turn the heat to medium-high. Attach your deep-fry thermometer to the side of the pan. Heat the oil until it reaches 350°F (175°C). If you do not have a thermometer, test by dropping a small piece of the coated chicken into the oil. It should sizzle immediately and float to the surface within 5 seconds. If it sinks and sits silently, the oil is too cold. If it smokes or turns dark brown in 10 seconds, the oil is too hot.
Step 3.2: Fry in batches.
You must fry the chicken in batches. Overcrowding the pan will drop the oil temperature dramatically, resulting in greasy, soggy, pale chicken. Depending on the size of your pan, fry the chicken in 3 or 4 batches.
- Carefully place one layer of coated chicken cubes into the hot oil. Do not drop them from height; use tongs to lower them gently to avoid splashing.
- Fry for 2-3 minutes without moving them. This allows the bottom to set and form a golden crust.
- After 2-3 minutes, use a slotted spoon or tongs to turn the pieces. Fry for another 2-3 minutes until all sides are deep golden brown and the chicken is cooked through (internal temperature of 165°F / 74°C).
- Using the slotted spoon, transfer the fried chicken to a wire rack set over a baking sheet. Do not drain on paper towels. Paper towels trap steam against the bottom of the chicken, making it soggy. A wire rack allows air to circulate, keeping all sides crisp.
- Repeat with the remaining batches. Between batches, allow the oil temperature to return to 350°F (175°C). This usually takes 1-2 minutes.
Signs of properly fried chicken:
- Deep golden-orange color (thanks to the paprika)
- Craggy, irregular surface with crispy protrusions
- Makes a loud, crunchy sound when tapped with a spoon
- No oily sheen; the surface should look dry and matte
Phase 4: Assemble and Serve Immediately
This is the final, rapid phase. Have your serving plate ready and your rice cooked.
Step 4.1: Reheat the sauce if necessary.
If your sauce has cooled and thickened too much (it may become almost solid), return the saucepan to low heat and stir gently until it loosens to a thick, pourable syrup. Do not boil again.
Step 4.2: Toss the chicken in the sauce.
Place all the fried chicken pieces into a large, clean mixing bowl. Pour the warm sauce over the chicken. Using tongs or two large spoons, toss gently but thoroughly until every piece of chicken is coated in a glossy, reddish-brown glaze. The sauce should cling to the chicken without pooling at the bottom of the bowl. If you see a puddle of liquid, your sauce was not thick enough.
Step 4.3: Serve without delay.
Transfer the glazed chicken to a serving platter. Serve immediately alongside steamed rice and, if desired, steamed broccoli. The dish loses its crispness within 10-15 minutes of being sauced, so call everyone to the table before you begin the final toss.
Garnishing (optional but recommended): Sprinkle with sesame seeds and sliced green onions for color, texture, and a fresh aromatic note. These are not in your ingredient list but are traditional and elevate the presentation significantly.
Conclusion
You have just created a homemade General Tso’s Chicken that rivals—and arguably surpasses—anything from a takeout menu. By using the simple ingredients you provided—chicken breasts, flour or cornstarch, paprika, garlic salt, oil, sugar, water, vinegar, salt, soy sauce, and optional chili flakes—you have produced a dish with four distinct layers of excellence: the shatteringly crisp coating, the juicy tender chicken within, the perfectly balanced sweet-sour-savory-spicy sauce, and the glossy, clinging texture that makes each bite a cohesive experience.
Let us reflect on why this method works. The separate sauce-making step allows you to control the viscosity precisely, ensuring it coats rather than soaks. The high-temperature frying in small batches guarantees maximum crispness. The wire rack draining prevents steam-induced sogginess. And the final quick toss means the chicken spends minimal time in contact with moisture. These are not complicated techniques, but they require attention and respect. The reward is a dish that is texturally superior to 95% of restaurant versions, which often sit under heat lamps for minutes before serving.
This recipe is also a testament to the power of a well-balanced sauce. The 1.25 cups of sugar might seem excessive, but when counterbalanced by 1 cup of vinegar and 6 tablespoons of soy sauce, the result is not cloying. It is bold, yes. It is indulgent. But it is also harmonized. The optional chili flakes add just enough heat to wake up your palate without overwhelming the other elements.
We encourage you to treat this recipe as a foundation. Once you have mastered the basic technique, experiment with the optional additions: a tablespoon of hoisin sauce for deeper umami, a teaspoon of toasted sesame oil for nuttiness, or a clove of fresh minced garlic in the sauce. You can also swap the chicken breasts for thighs, or the flour for cornstarch, to see which texture you prefer. The method remains the same.
Below, you will find detailed answers to the most common questions about General Tso’s Chicken. These FAQs address ingredient substitutions, troubleshooting common problems, storage, and dietary adaptations. Whether you are wondering about gluten-free options, reheating strategies, or why your chicken turned out soggy, you will find the answer here.
Frequently Asked Questions (FAQs)
Q1: Should I use all-purpose flour or cornstarch? What is the difference?
Both work, but they produce different results. All-purpose flour creates a thicker, more substantial, craggier crust. It absorbs more sauce and yields a texture reminiscent of traditional American-Chinese takeout. The crust is slightly softer after saucing. Cornstarch produces a lighter, thinner, glass-like crust that is exceptionally crispy and shatteringly delicate. It absorbs less sauce, so the chicken remains crunchier for longer. Cornstarch is the preferred choice in many professional kitchens for this reason. For the ultimate texture, use a 50/50 blend of flour and cornstarch. However, using either one exclusively, as your ingredient list allows, will produce excellent results.
Q2: My chicken was not crispy. What went wrong?
There are five common culprits for soggy General Tso’s Chicken:
- Oil temperature too low (below 325°F / 163°C). The chicken absorbs oil instead of sealing and crisping. Use a thermometer.
- Overcrowding the pan. This drops the oil temperature instantly. Fry in small batches.
- Draining on paper towels. Paper towels trap steam against the chicken. Use a wire rack.
- Letting the sauced chicken sit before serving. The sauce begins softening the crust within 60 seconds. Serve immediately.
- The sauce was too thin. A watery sauce soaks into the coating. Simmer your sauce longer until it is syrupy.
Q3: Can I make this recipe gluten-free?
Yes, with one simple substitution. Replace the all-purpose flour with a gluten-free all-purpose flour blend (containing rice flour or potato starch) OR use cornstarch exclusively. Cornstarch is naturally gluten-free. Also ensure your soy sauce is gluten-free (use tamari or a certified gluten-free soy sauce). All other ingredients—sugar, vinegar, paprika, garlic salt, chili flakes—are naturally gluten-free.
Q4: The sauce is too sweet / too sour / too salty. How can I adjust it?
Your palate is unique, and ingredient brands vary in intensity. Here is how to adjust the sauce before you add the chicken:
- Too sweet: Add an extra 1-2 tablespoons of white vinegar or 1 teaspoon of soy sauce. Do not add more salt.
- Too sour: Add 1-2 tablespoons of sugar and a splash of water. Simmer for 2 minutes to dissolve.
- Too salty: This is difficult to fix once added. Add 1/4 cup of water and 1 tablespoon of sugar, then simmer to reduce again. Prevention: use low-sodium soy sauce if you are salt-sensitive.
Always taste the sauce before tossing it with the chicken. Adjust seasonings while the sauce is still in the saucepan.
Q5: Can I use chicken thighs instead of breasts?
Absolutely. Chicken thighs are more forgiving because they contain more fat and remain juicier even if slightly overcooked. Cube boneless, skinless thighs into 1-inch pieces. Follow the exact same coating and frying instructions. The cooking time may be 30-60 seconds longer because thighs are denser. Check for doneness by cutting one open; there should be no pink.
Q6: My sauce turned into hard candy or burned. What happened?
Sugar-based sauces are prone to burning if left unattended. This happens when:
- You boiled the sauce at too high a temperature after it had already thickened.
- You simmered for too long (beyond 12 minutes).
- You walked away and did not stir, causing sugar to caramelize on the bottom.
If your sauce hardens in the pan, discard it and start over. To prevent this, simmer at a gentle bubble, stir every 2 minutes, and remove from heat as soon as it coats the back of a spoon.
Q7: Can I double this recipe?
Yes, but you must fry in more batches. Do not double the sauce in a single saucepan; the increased volume will take much longer to reduce and may overflow. Instead, make two separate batches of sauce, or use a very large pot and extend the simmering time by 5-8 minutes. For frying, doubling the chicken means you will have 4-6 batches. Allow the oil temperature to recover fully between batches. Expect the entire process to take 45-60 minutes for a double batch.
Q8: How do I store and reheat leftovers?
General Tso’s Chicken is best eaten fresh, but leftovers are common. Store in an airtight container in the refrigerator for up to 3 days. Reheating is challenging because the sauce will have softened the crust completely. The best method:
- Oven or toaster oven: Spread the chicken on a baking sheet. Bake at 400°F (200°C) for 5-7 minutes until hot and the edges re-crisp slightly.
- Air fryer: Reheat at 375°F (190°C) for 3-4 minutes.
- Skillet: Reheat over medium heat with a tiny splash of water to loosen the sauce, stirring constantly.
- Avoid microwave: The microwave will turn the coating into a rubbery, steamed mess.
Q9: Can I make the sauce ahead of time?
Yes, and this is a great time-saving strategy. Make the sauce as directed, simmer until thickened, and then let it cool completely. Store in a sealed jar in the refrigerator for up to 2 weeks. When ready to use, reheat gently in a saucepan over low heat, adding a tablespoon of water if it has become too thick. Do not boil again. Then proceed with frying the chicken fresh.
Q10: Is there a way to make this dish less oily or lower in calories?
Frying inherently adds oil, but you can reduce oil absorption by:
- Ensuring your oil is at exactly 350°F (175°C). Too-cold oil absorbs more oil.
- Draining on a wire rack instead of paper towels.
- Using an air fryer instead of pan-frying. Toss the coated chicken in 1 tablespoon of oil, then air fry at 400°F (200°C) for 10-12 minutes, shaking halfway, until golden and crisp.
You can also bake the coated chicken on a wire rack over a baking sheet at 425°F (220°C) for 20-25 minutes, flipping once. The texture will be less crunchy but still good.
Q11: I don’t have garlic salt. What can I use instead?
Mix 1 teaspoon of garlic powder with 1 teaspoon of fine salt. Whisk this into the flour along with the paprika. Do not simply add garlic powder alone, as you will lose the salt component that seasons the chicken coating.
Q12: The red chili pepper flakes made the sauce too spicy for my family. How can I reduce the heat?
The easiest solution is to omit them entirely, as noted in the ingredient list. If you already made the sauce too spicy, you cannot remove the heat, but you can dilute it. Make a second batch of sauce without chili flakes and combine the two. Alternatively, serve the spicy sauce on the side and let individuals add their own. For a milder warmth without aggressive heat, use 1/2 teaspoon of chili flakes instead of 1 teaspoon.
Q13: Can I add vegetables to this dish?
Yes, and it is common to serve General Tso’s Chicken with broccoli. Steam fresh broccoli florets until bright green and tender-crisp (about 3-4 minutes). Toss the steamed broccoli with the sauced chicken, or serve it alongside. You can also add sliced bell peppers, snow peas, or carrots. Do not cook vegetables in the frying oil used for the chicken, as the flour coating will burn and make the oil dirty.
Q14: Why is there no cornstarch slurry or thickener in the sauce?
Excellent observation. Most General Tso’s sauces rely on a cornstarch slurry (cornstarch mixed with water) to thicken. This recipe does not use one because the large quantity of sugar acts as the thickener. When sugar is dissolved in water and simmered, it naturally concentrates into a syrup. This creates a clearer, glossier, more authentic glaze than cornstarch, which can turn cloudy or gelatinous. The sugar-only method also produces a sauce that clings beautifully without becoming gummy.
Q15: This recipe uses a lot of sugar and oil. Is it really worth making at home?
That is a fair question. Yes, it is worth it for two reasons. First, control: you know exactly what is going into your food. No preservatives, no artificial colors, no MSG (unless your soy sauce contains it). Second, quality: homemade General Tso’s Chicken, when done correctly, is significantly crispier, fresher, and more balanced than takeout. Think of it as an occasional indulgence, not an everyday meal. Serve it with plenty of steamed vegetables and rice to create a more balanced plate.
PrintThe Ultimate Guide to Crispy Homemade General Tso’s Chicken: Balance, Technique, and Flavor
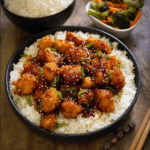
Crispy homemade General Tso’s Chicken with a perfectly balanced sweet, tangy, and slightly spicy sauce. A delicious takeout-style dish you can easily make at home.
- Prep Time: 15 minutes
- Cook Time: 20 minutes
- Total Time: 35 minutes
- Yield: 4 servings
- Category: Main Dish
- Method: Frying
- Cuisine: Chinese-American
Ingredients
- 4 chicken breasts, cubed
- 1 cup all-purpose flour (or cornstarch)
- 1 tsp paprika
- 2 tsp garlic salt
- 3/4 cup oil (for frying)
- 1 1/4 cup sugar
- 1 cup water
- 1 cup white distilled vinegar
- 1 tsp salt
- 6 tbsp soy sauce
- 1 tsp red chili pepper flakes (optional)
Instructions
- Coat chicken pieces in flour, paprika, and garlic salt.
- Heat oil in a pan and fry chicken in batches until golden and crispy. Set aside.
- In a saucepan, combine sugar, water, vinegar, salt, soy sauce, and chili flakes.
- Bring sauce to a boil, then reduce heat and simmer until slightly thickened.
- Add fried chicken into the sauce and toss until fully coated and glossy.
Notes
- Use cornstarch for extra crispiness.
- Adjust chili flakes to control spice level.
- Serve immediately for best texture.